StockTrak LMS Integration Instructions
This guide outlines the process for integrating StockTrak with your university’s Learning Management System (LMS).
Our platform leverages Single Sign-On (SSO) through Edlink, a secure service that allows users direct access to StockTrak via their existing LMS credentials. This eliminates the need for managing separate logins and passwords, simplifying access for everyone.
Important Note: This integration requires the expertise of our dedicated LMS Integration Team. Direct self-service setup is not available. You will collaborate with one of our Account Managers who will guide you through the integration process.
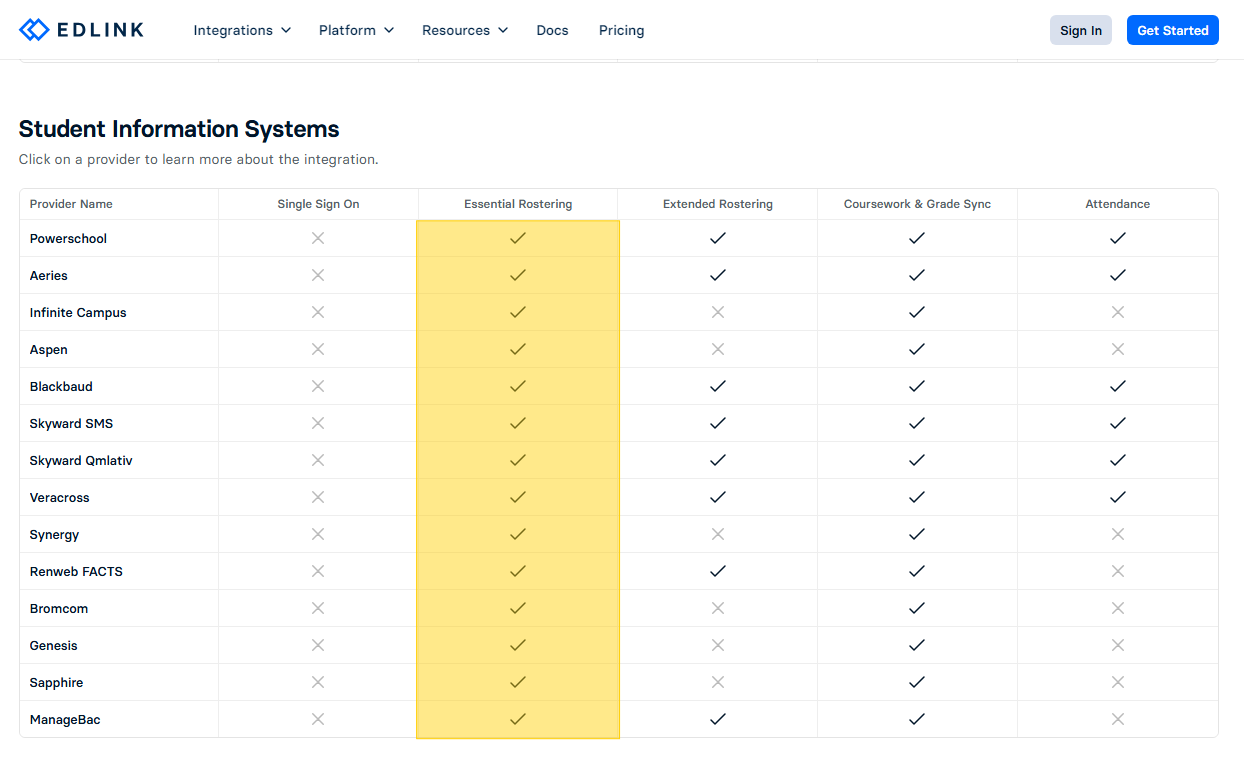
Supported LMS & SSO Integrations
A comprehensive list of supported LMS, SIS, and IDP providers can be found here: https://ed.link/resources/integrations
If your institution’s LMS or SSO provider is not listed, please inform your Account Manager. Our LMS Integration Team will work closely with Edlink to explore available integration options.

Integrating StockTrak with Your LMS: A Step-by-Step Guide
Before You Begin:
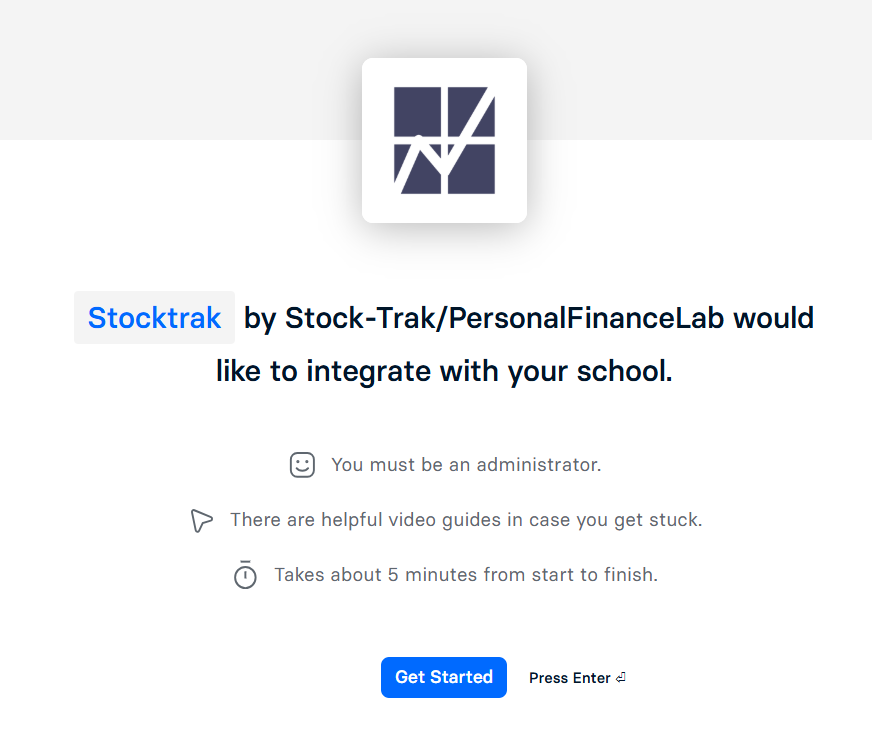
Otherwise, you can create a session by clicking:
- Contact Your Account Manager: Your dedicated Account Manager will provide a unique link necessary to begin the LMS integration. Keep this link handy as you’ll need it to proceed.
- Administrative Privileges Required: The following steps must be completed by a university administrator with appropriate LMS permissions. If you do not have these, please forward this guide to the appropriate member of your staff.
Step-by-Step Instructions
Overview
- Click the unique link provided by your Account Manager to access the Edlink Overview page.
- Click ‘Get Started’ or ‘Enter’ to continue.
Account
- Use your university administrator email account to create your Edlink account.
- Choose a secure password and accept the Terms & Conditions to continue.

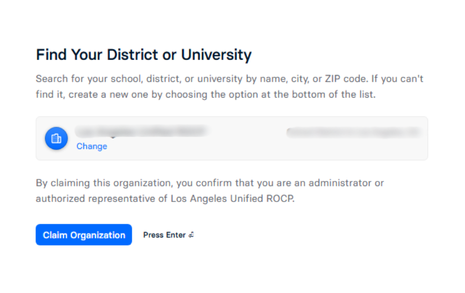
University Identification
- Begin typing the name of your university to display matching entries. Select the correct option from the dropdown menu.
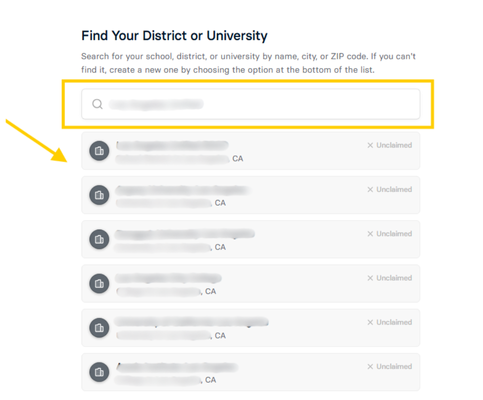
- Click ‘Claim Organization’ to continue.
Data Source Selection
- From the list provided, select the LMS or SSO platform used by your university. Click ‘Continue’.
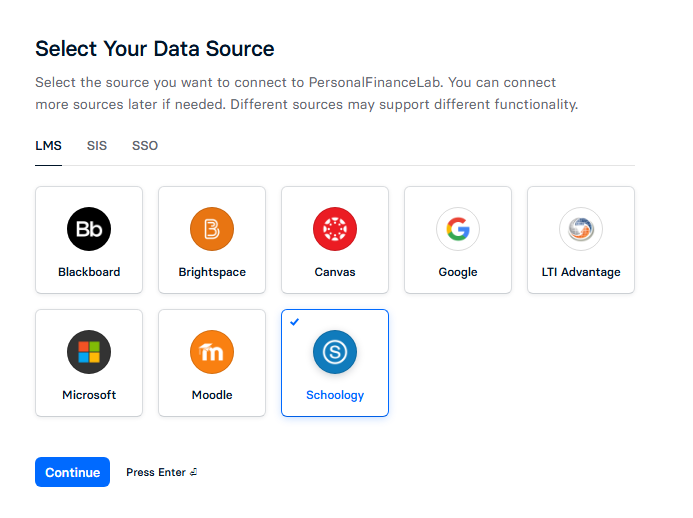
The following steps assume you’re using Schoology. Click one of the options below to reference guides for the most popular data sources, or to view the full library of guides.
If your data source is not listed: Please contact your Account Manager. Our team will work with Edlink to explore integration options.
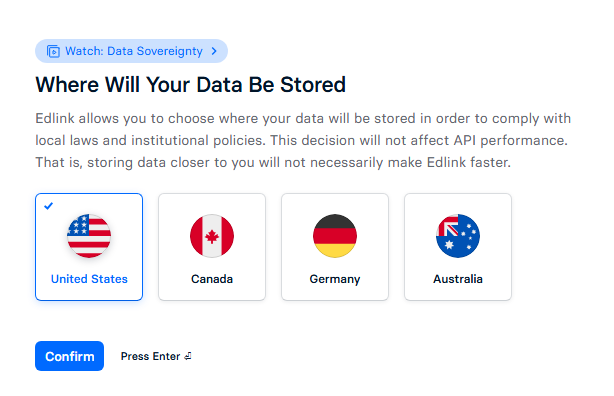
- Select the location for data storage and click ‘Confirm.’
Data Source Configuration
- Custom URL (If Applicable): If your university utilizes a custom URL for your LMS (e.g., https://myschool.schoology.com or https://schoology.myschool.edu), enter the full URL (including https://) in the text box.
- No Custom URL: If your university does not use a custom URL, check the box labeled ‘No Custom URL.’
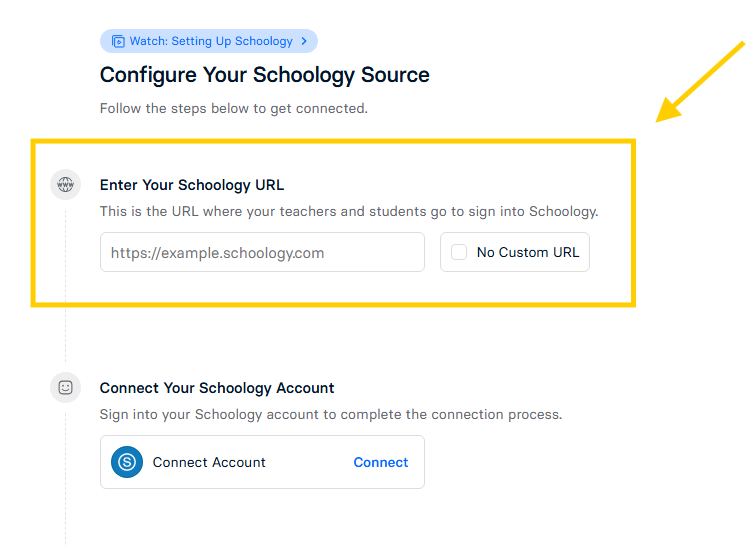
- Click ‘Connect’ to connect your account. You will be prompted to log into your LMS platform to authorize Edlink to access your account.
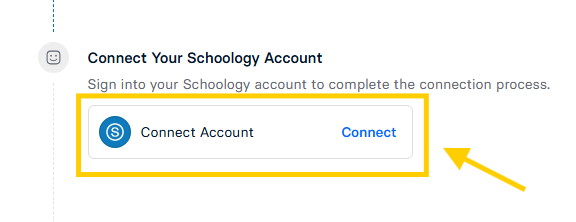
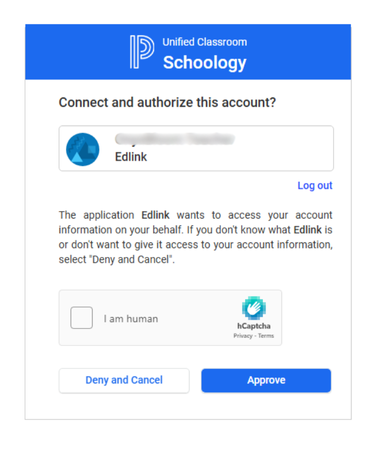
- In the pop-up window, click ‘Approve’ (or the equivalent authorization button) to grant Edlink access. You will be redirected to the Configure Your Data Source page.
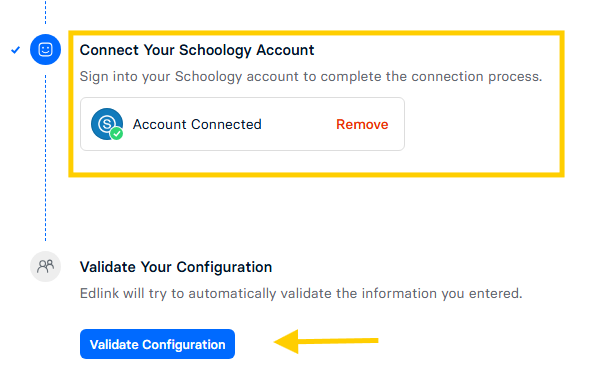
- Then click ‘Validate Configuration.’
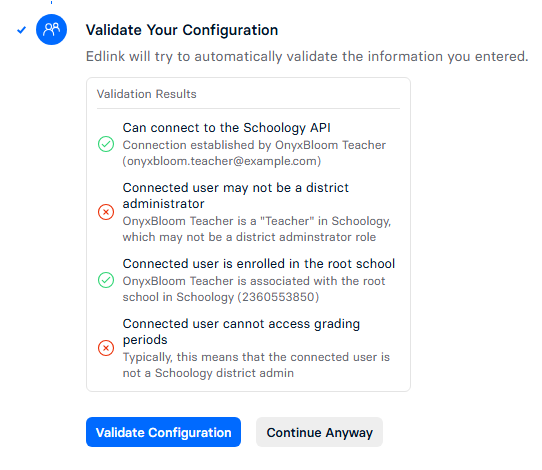
Validation Results
- Incorrect Account Error: If you are not using the appropriate account, you will see an error message. The integration must be configured by a school administrator account.
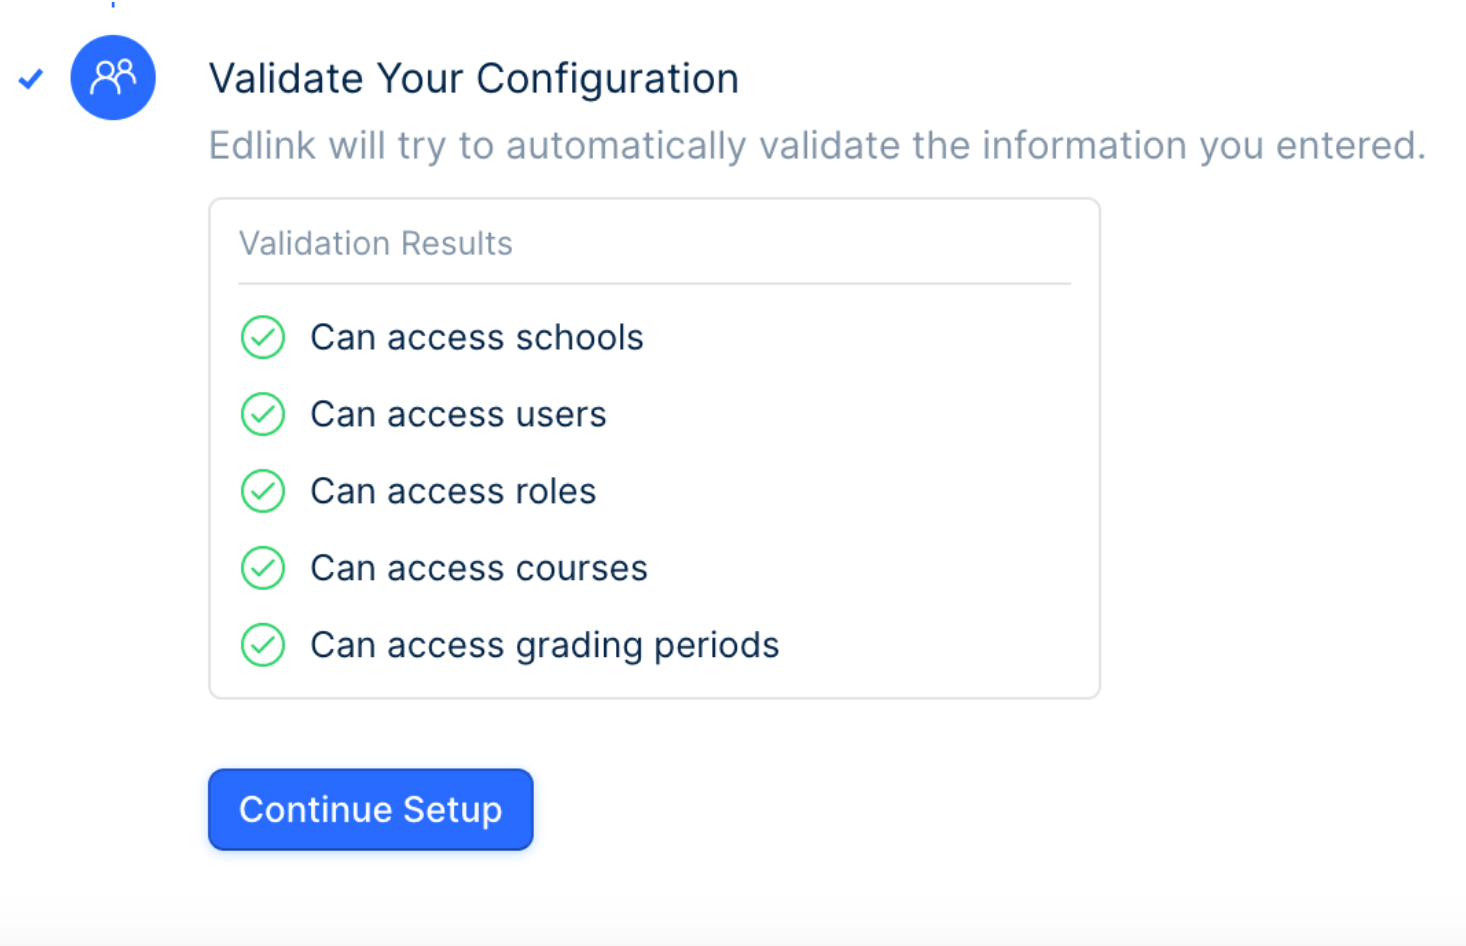
- Administrator Account Success: If you are using a school administrator account, you should see a success message. Click ‘Continue Setup.’
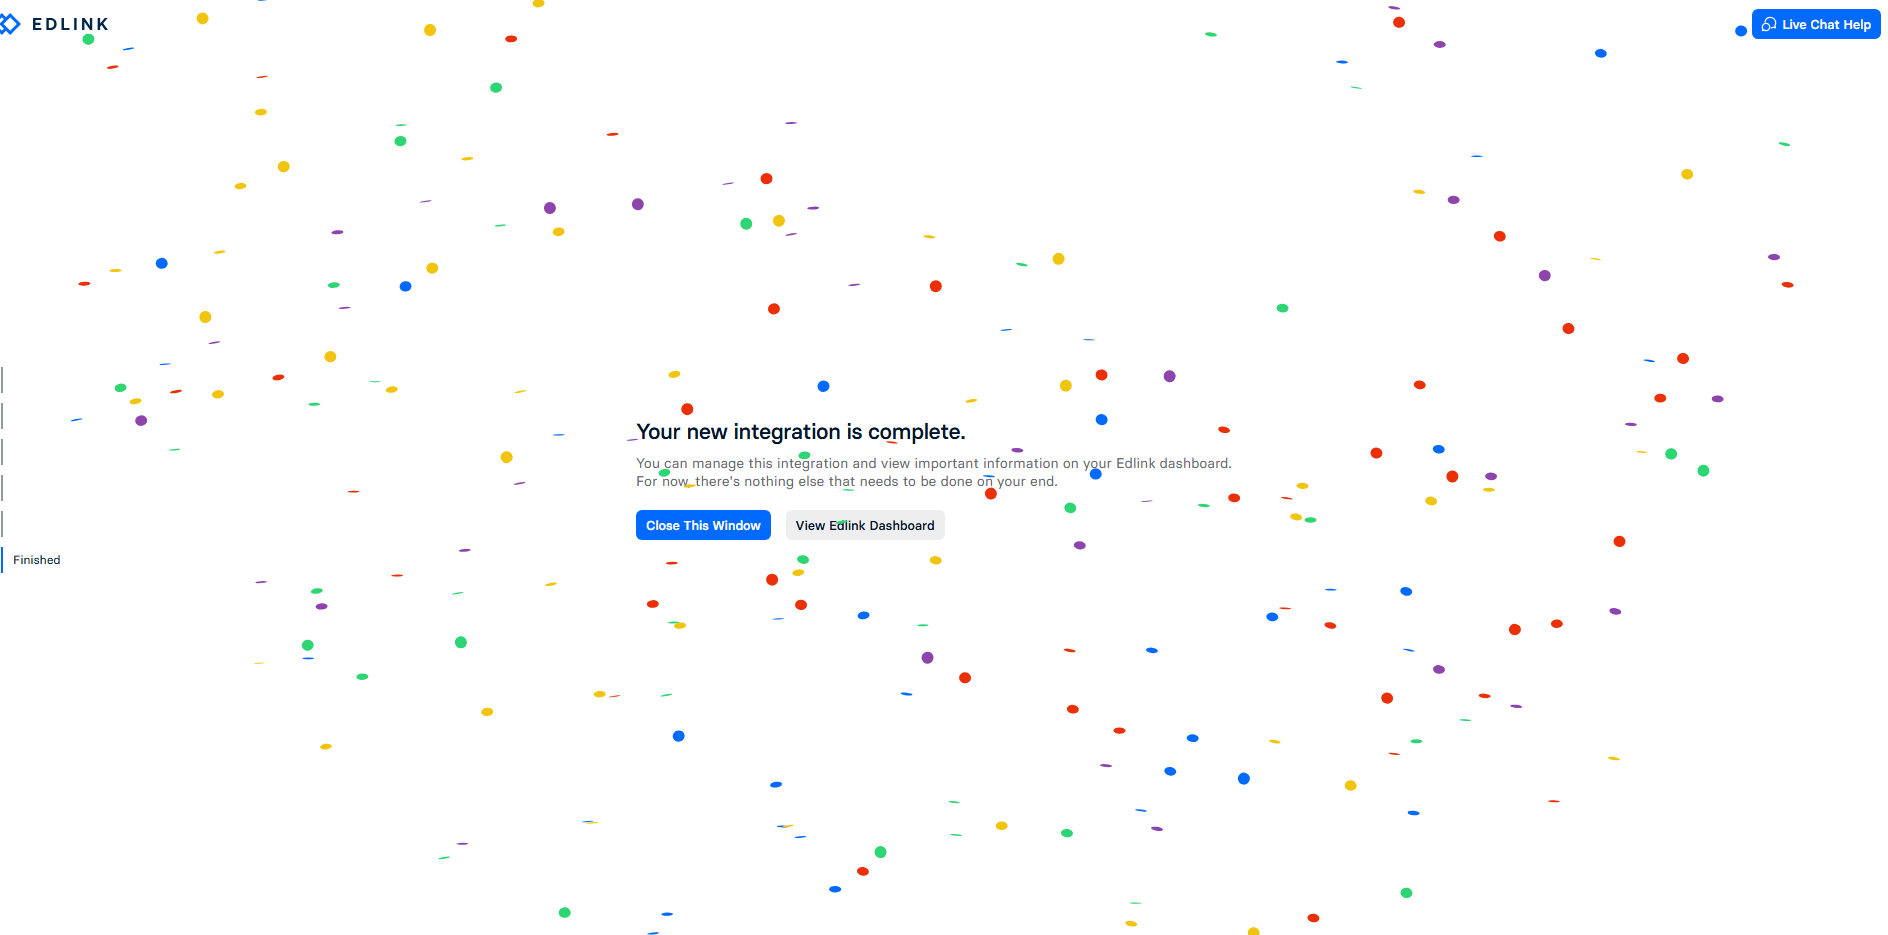
Integration Confirmation
- Congratulations! If you see confetti, you’ve successfully completed this stage of the integration process!
- Click on ‘View Edlink Dashboard’ to proceed to the next section: Configuring SSO Rostering.
Important: Your StockTrak Account Manager will now finalize the integration on our end.
Next Steps
- Notify Your Account Manager: Once you’ve completed the above steps, please contact your Account Manager via email or phone to inform them.
- Integration Activation: Your Account Manager will notify our integration team to finalize the integration and confirm its activation.
- Confirmation & Access Details: Your Account Manager will contact you as soon as the LMS integration is active. You will receive the following information via email:
- LTI URL and the secret password
- StockTrak logo to upload manually to your data source